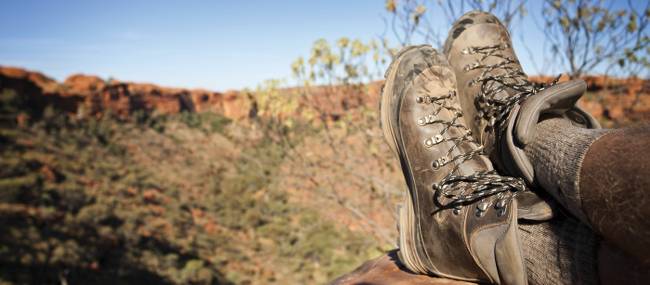
Foot rest on the Larapinta trail, Northern Territory
Blog home / Blister prevention while on the trails
Sometimes the best way to see the untamed, rugged and raw landscapes of a destination is to see it on your own two feet. Trekking is all about embracing unique moments in some of the most isolated parts of the Australia, and immersing yourself in the incredible landscapes this country has to offer. And when you're experiencing it while on a walk or multi-day trek, it's important to know how - and when - to treat blisters that you may feel forming on your feet.
How do blisters occur?
Blisters form when there is too much friction between your foot and your hiking boots. Blisters most commonly appear on your heels or around your toes, but they can appear anywhere on your body if the activity is repetitive enough and creates friction against your skin. On multi-day treks, blisters can make or break your experience, so to ensure your feet are healthy, comfortable and blister free, we recommend using the following techniques to prevent and treat forming hot spots.
Prevention
Your hiking boots
Start your trek on the right foot, by wearing a pair of hiking boots that you have already broken in. If you feel your boots pinch your toes together uncomfortably, they may be too small for you and your likelihood of blisters while on the trek is almost guaranteed. At the same time, a pair of hiking boots that are too big for you will make your feet move around loosely in the boots, creating unnecessary friction and consequently, increase the likelihood of blisters. A well-fitting pair of hiking boots will leave enough space for your toes, even when descending a steep hill. They will, however, hold your heels securely in place, which will prevent any heel blisters from forming.
Even if you do already own a pair of hiking boots in the right size for your feet, there is another factor that can go wrong concerning your trekking boots. Every pair of hiking boots has to be well broken in before being taken on their first hike. If not, the stiffness of a new set of boots can create unnecessary pressure on certain parts of your feet and cause blisters. Breaking your hiking boots in slowly will make their sole more flexible and mold the inside of the shoe to your feet, helping create the perfect fit for your foot.
Your Socks
Ensure you wear the right pair of socks when you are on the trail, taking into consideration the terrain, weather and temperatures. Hiking socks are usually thicker in certain areas, such as the heel and the ball of the foot, to reduce friction against your skin and provide padding between your trekking boots and your feet. Avoid cotton socks, as these take extremely long to dry and are likely to bunch up in certain places around your foot. Cotton fabric tends to absorb your sweat and hold the moisture, while the bunched up fabric will rub against your skin and create blisters. Hiking socks are made from various natural and synthetic materials, designed to transport moisture from your foot, through the socks and into the material of your hiking boots. If you have a breathable pair of hiking boots, these will then transport the moisture out of the boot and leave your feet dry and comfortable, with a low risk of blisters.
Wearing two pairs of socks is another way to reduce friction and minimize the likelihood of blisters forming. Very thin synthetic socks closest to your skin with regular hiking socks worn on top. The theory is that the socks will absorb any friction. There are socks specifically designed for this purpose and, if you are susceptible to blisters, it’s worth trialing this method.
On Trail
There are a few things you can do to prevent blisters right before you start the trail or even during the hike. If you already know of any problem areas that are likely to form blisters, you can tape them at the beginning of the trail to reduce friction. If you start feeling any of these hotspots getting uncomfortable, tend to them immediately to prevent blisters from forming. You can do this by taping them with moleskin, bandages, medical leukotape or even duct tape. Alternatively, if none of these methods are available to you, simply take a break and take your shoes and socks off for a while to let your feet air out and give your feet a well earned rest.
If your feet get wet or sweaty enough to soak your socks, this is also a good opportunity to air them out. Moisture creates more friction and favourable conditions for blisters to form. When putting your shoes back on, make sure you tie them properly in a way that relieves the hotspots from pressure or friction. Another way of avoiding wet feet is changing your socks regularly throughout the day; your dry, blister free feet will thank you later.
Treatment
Notify your guides
Our guides are trained on how to best treat blisters to reduce physical discomfort while on the trail. If you feel a blister forming be sure to notify your guides the moment you notice it. Our guides will be happy to take a short break and provide treatment to the area, whether it means bandaging the blister, adjusting your laces, or suggesting other methods to relieve your discomfort. Don't wait until a blister is already giving you pain before you notify our guides, as by this time the preventative measures to reduce the severity of the blister may not be applicable to your scenario.
Self-guided treks
If you are embarking on a self-guided trek, we recommend you prepare yourself with the knowledge on how to treat blisters and hotspots yourself before embarking on a your trip.
Firstly, try to avoid creating any more friction on the affected spot by covering the area with an extra layer between your skin and your boots. You can use normal plasters or gauze, but those can come off rather quickly if you keep hiking that day. Another option is using special blister plasters, which are designed to protect blisters from friction entirely for the duration of your hike. They are a little more expensive than normal plasters, but they are very light and won't add a lot of extra weight to your pack. To use them, you do not have to pop the blister... Just slap it on your skin and it will work its magic. There are also special creams and powders available at some pharmacies, however these are not one-size-fits-all treatments and have a lot of pro's and con's. If your blister has popped, it's important to protect the blister from infection, so apply a disinfectant cream to the area and cover it with a plaster to prevent dirt and sweat from touching the sore.
Popping a blister is a controversial topic still, which doctors and scientists have yet to agree on. Small blisters, which are not painful, should usually not be drained. The intact skin on them protects them best from infection. Draining a blister that is larger and painful can increase the risk of an infection, especially if you are on trail and don't have any antibacterial solution with you to clean your hands and needle before you drain it. Generally, a blister will pop by itself after some time, if you keep walking on it and the friction on the skin does not stop. Should the blister pop inside your hiking boot and sweaty sock, it is not very well protected from the dirt and bacteria inside your shoe. You will have to decide for yourself, which method you prefer. Generally, if you only have a short time left to hike, you could as well leave the blister as it is, however this could prove to be very painful if you continue to walk on it. If you are on a multi-day hike and still have a few days to go, popping it may be a better option to avoid it from breaking inside your sweaty socks. Either way, try to keep the remaining skin over the blister, even after it has popped. It usually protects the wound well from dirt and further damage.
To drain a blister, start out with clean hands and also clean the area around the blister with water, soap and alcohol. Use a sterilized needle to pop it. To sterilize it, use rubbing alcohol or run the needle through an open flame until it turns red. Another option is to submerge the needle in boiling water for two minutes. Puncture the blister at the bottom end. The opening should be as small as possible, while still being big enough to drain the fluid. Make sure to remove all the fluid by carefully massaging it towards the opening, starting from the top of the blister. Afterwards, you should apply a disinfectant or blister product. If you are going to keep walking, cover the area to protect it from dirt and friction.
If on a self-guided trek and you are in doubt as to what to do, do not hesitate to call our guides using the satellite communication devices provided to you at the start of your trek. By explaining the situation to our guides at our operational base, they will be able to give you the best advice for your certain scenario.